
For the complete documentation index, see llms.txt.An Area of Interest (AOI) is a workspace-level geographic region you persist alongside the spacecraft fleet. Every AOI is automatically evaluated against every spacecraft in the workspace, producing a 7-day forecast of predicted overflight opportunities on demand — there is no per-spacecraft binding step. The AOI Overview page is where you read one AOI in depth, edit its identity and geometry in place, and act on its overflight forecast. Route:
/aoi
Open the page via the AOIs entry in the sidebar.
Page Layout
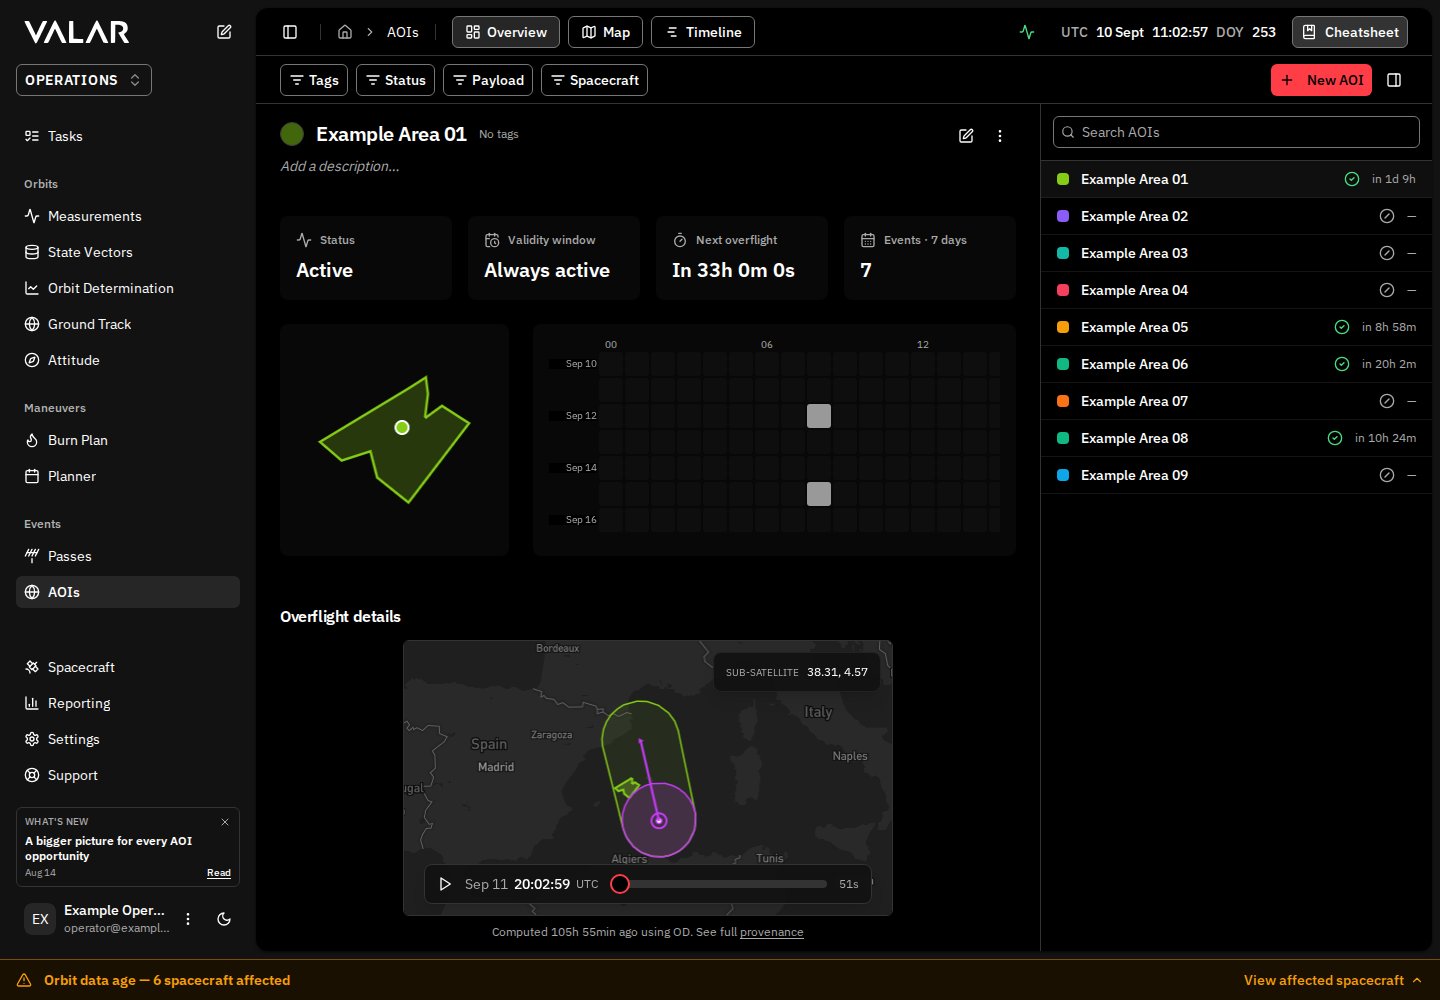
The right-docked AOI list pane is shared with the AOI Map page and is rendered identically on both routes.
Right-Pane AOI List
The AOI list pane is a vertical column on the right edge of the page. From top to bottom:
Clicking a row selects the AOI and updates the URL to
/aoi?selected=<id>. The URL parameter survives reloads and links — paste /aoi?selected=<id> to deep-link straight to a specific AOI. If the value is empty or does not identify an available AOI, the page falls back to the first available AOI instead of leaving the page without a selection.
When the search box plus the topbar filters narrow the list to zero rows, the pane renders No AOIs match these filters with a Clear filters link that resets every filter. When the workspace has no AOIs at all, the pane shows No AOIs yet with a Create your first AOI button that opens the creation method picker on the AOI Map page.
The collapse toggle in the top bar hides the list pane so the main content takes the full page width; click it again to bring the list back.
Identity Hero — In-Place Editing
The identity hero is the top band of the Overview page. By default every field renders as plain text — selection alone does not let you edit. Click the pen icon at the right edge of the hero to switch into edit mode. The pen icon is the only entry point to editing; switching to a different AOI in the list resets edit mode back off. In edit mode, each identity field becomes inline-editable:
To the right of the pen icon, the kebab menu offers two actions, both enabled only when edit mode is on:
The status pill in the hero shows the AOI’s lifecycle state:
Geometry Block
The geometry block is rendered as two columns. On the left, a 16:9 Mapbox preview auto-zooms to the AOI’s bounding box and renders the shape in the AOI’s chosen colour. On the right, a properties column lists the geometry’s derived values.
Geometry Preview
The preview is a read-only map by default. Reference frame is WGS84 geodetic — every coordinate is latitude / longitude on the WGS84 ellipsoid. The camera fits the AOI’s bounding box with consistent padding on every load, and reapplies when you switch between light and dark themes. When edit mode is on, an editor opens beneath the preview. You can adjust the geometry by:- Dragging a vertex, midpoint, or disk handle directly on the preview.
- Editing the structured coordinates in the editor card (vertices for a polygon, centre + radius for a disk, per-piece vertices for a multipolygon).
- Clicking Replace from file… in the editor’s control row to swap the whole boundary for one read out of a file.
Replace the Boundary From a File
When a corrected outline arrives as a file, you do not have to delete the AOI and recreate it. In edit mode, click Replace from file… in the editor’s control row to open the Replace boundary from a file dialog and swap the boundary in place.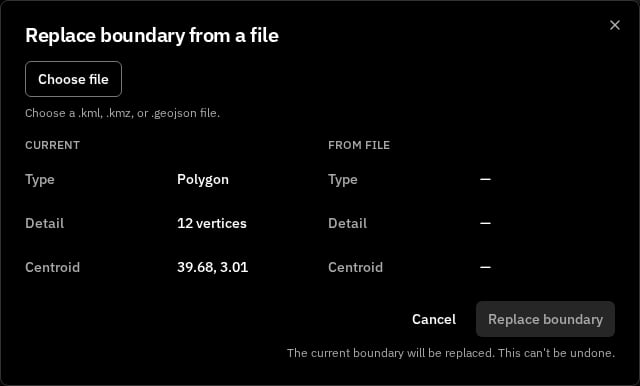
The line
The current boundary will be replaced. This can't be undone. sits beneath the primary action. There is no boundary history and no undo, so keep the previous file if you may need to go back.
Only the boundary changes. The AOI’s name, description, tags, colour, active flag, and validity window are untouched by the replacement, and a successful replacement triggers an automatic recompute exactly as an in-place geometry edit does.
The comparison answers “is this the right shape, in the right place?” — it is not an approval. The boundary is checked when it is saved, under the same rules that apply however the boundary arrived, so a file the dialog can read can still be refused. A refusal is shown inside the dialog with your chosen file still selected, so you can pick another without starting over; the dialog closes only once the replacement is saved.
Geometry Properties
The properties column lists derived values for the current geometry:
In edit mode, Validity window opens an edit dialog:
- Edit validity window opens a modal with two independent date-time pickers, one per bound. Each bound has a Set / Open-ended switch — flip a switch to Open-ended to leave that side unbounded, or to Set to surface a MiniCalendar plus an
HH:MMinput. Leaving both sides Open-ended means the AOI is always active; setting only one means it is bounded on that side and open on the other. When both bounds are Set, the end must be strictly after the start — otherwiseValidity end must be after validity startsurfaces and Save is disabled. All times are UTC.
Export a Boundary
An area’s boundary can be handed to another tool as a file. Open the area’s own actions menu — the kebab beside the edit control in the identity hero — and choose Export as GeoJSON or Export as KML. The file downloads straight away, and nothing about the area changes.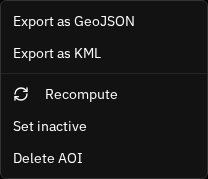
The date in the filename is the UTC calendar date of the export.
What the File Carries
The file holds the boundary only — the outline, the area’s name, description, and tags, and a small provenance block. It does not carry the area’s overflight forecast, its validity window, its colour, or its active state. Each file also records how far its straight segments depart from the great-circle boundary VALAR computes overflights against. That figure is measured for each file individually and stays within 250 m for absolute latitude up to 89.5°. Both format pages document the bound and its limits in full.A file VALAR exports is not guaranteed to import back into VALAR. Export hands a boundary to another tool; it is not a way to move areas between workspaces. To change an area’s boundary here, use Replace from file… in the geometry editor instead — see Replace the Boundary From a File.
When Export Is Unavailable
Four kinds of area cannot be exported. Their menu entries stay visible but are not actionable, and the reason appears when you hover or focus the entry:
Exactly one reason is shown at a time, even when an area meets more than one.
Events Section
The events section is the bottom band of the page. It composes the visibility, payload, and spacecraft filters, the Recompute action, the opportunity heatmap, and the detail panel for whichever opportunity the heatmap currently has selected.Header Controls
Empty States
When the AOI or workspace is in a state that explains why no opportunities are displayed, the events section surfaces a guidance card in place of the detail panel. Only one card is shown at a time, and the priority order is: For an Inactive AOI, the Recompute, Provenance, Payload, and Spacecraft controls are absent rather than disabled. The guidance card reads AOI is inactive andReactivate this AOI to see upcoming overflights.
Opportunity Heatmap
The heatmap is a 7×24 density grid — 7 days (rows) by 24 UTC hours (columns) — shading each cell by how many opportunities start in that hour across the contributing spacecraft. It is both the navigator and the selector: clicking a cell scopes the view to that one-hour stretch and automatically selects the first opportunity in it, loading that opportunity’s detail panel below. When a bucket holds more than one opportunity, a compact list of preview rows — spacecraft, payload, and UTC entry time — appears beneath the grid so you can pick a different one from the same bucket; hovering an occupied cell shows the same preview rows in a tooltip. A Show all opportunities control appears once a cell is scoped — click it to clear the scope and reselect the very first opportunity across the full default horizon (now through the next 7 days). The visibility, payload, and spacecraft filters all apply to the heatmap. See Overflight Events for the full heatmap mechanics.Opportunity Detail
Selecting an opportunity — by clicking a heatmap cell or one of its preview rows, as described above — opens its detail panel, showing:
When a spacecraft filter is active, an
N of M shown indicator appears beneath the heatmap so you always know how many opportunities the filter is hiding.
Auto-Trigger on Edit
Committing any of the following edits triggers an automatic recompute — you do not need to click Recompute afterwards:- Geometry edits (any vertex, disk centre or radius, multipolygon piece), and a whole-boundary replacement from a file.
- Validity window changes.
- Setting the AOI Active or Inactive from the kebab menu.
- Flipping the Include off-nadir opportunities switch in the Edit AOI dialog, either direction. The switch surfaces opportunities the payload can be pointed at rather than only those directly overhead, and changing it recomputes this area of interest’s overflight forecast. It is set per area of interest, so every opportunity in this AOI shares this AOI’s setting.
Workspace-Scoped Evaluation
Every AOI is automatically evaluated against every spacecraft in the workspace. There is no AOI-to-spacecraft subscription step; the spacecraft filter is just a UI affordance on top of the full result set.7-Day Forecast Horizon
The forecast horizon is fixed at 7 days from the instant you click Recompute. Configurable horizons are not yet available. Event timing is better than 1 second at day 1 of the forecast. LEO spacecraft below 500 km may drift a few seconds at day 7 because of atmospheric drag uncertainty. After a fresh orbit determination or a known manoeuvre, click Recompute again to anchor the schedule on the new ephemeris.Related Pages
- AOI Map — view every AOI at once on a full-bleed world map and drive creation from the same surface.
- Create an AOI — define an AOI by drawing, by typing coordinates, or by pasting a GeoJSON file.
- Overflight events — the heatmap’s selection mechanics, per-opportunity detail, recompute mechanics, and the 7-day forecast horizon.
- Off-nadir Opportunities — the per-AOI opt-in, the assessment vocabulary, and the geometric-bound disclaimer in full.
- GeoJSON file format — the supported RFC 7946 subset accepted for AOI creation.
- KML and KMZ files — the geometry accepted from a
.kmlor.kmzfile, when creating an AOI and when replacing its boundary.